
Does the Handheld CO2 Cannon Come With Extras?
Does the Handheld CO2 Cannon Come With Extras?
How many Handheld Co2 Cannon Packages are there?
CryoFX® explains what the packages include!
A Handheld Co2 Cannon Package is a great intro setup for DJs!
Contact us NOW for info...Call:1.855.527.9639

CryoFX LLC • 3859 S Valley View Blvd, Suite 2, Las Vegas, NV 89103 • 1.855.527.9639
Does the handheld CO2 cannon come with extras?
It's one of the first questions buyers ask: what's actually in the box, and what do I still need to make this work?
The short answer is that a CryoFX handheld CO2 cannon ships with everything you need to connect it to a tank and fire it. Everything except the tank itself. That single gap catches first-time buyers off guard more often than you'd expect, and the consequences of not planning for it range from a delayed first use to a complete show failure if you're not paying attention.
Here's the full breakdown of what comes with a handheld CO2 cannon, what you'll need to source separately, and how to get everything ready before your first event.
What's in the box
When you receive a CryoFX handheld CO2 cannon, the box contains the cannon unit, a CO2 hose, all fittings, and CO2 washers.
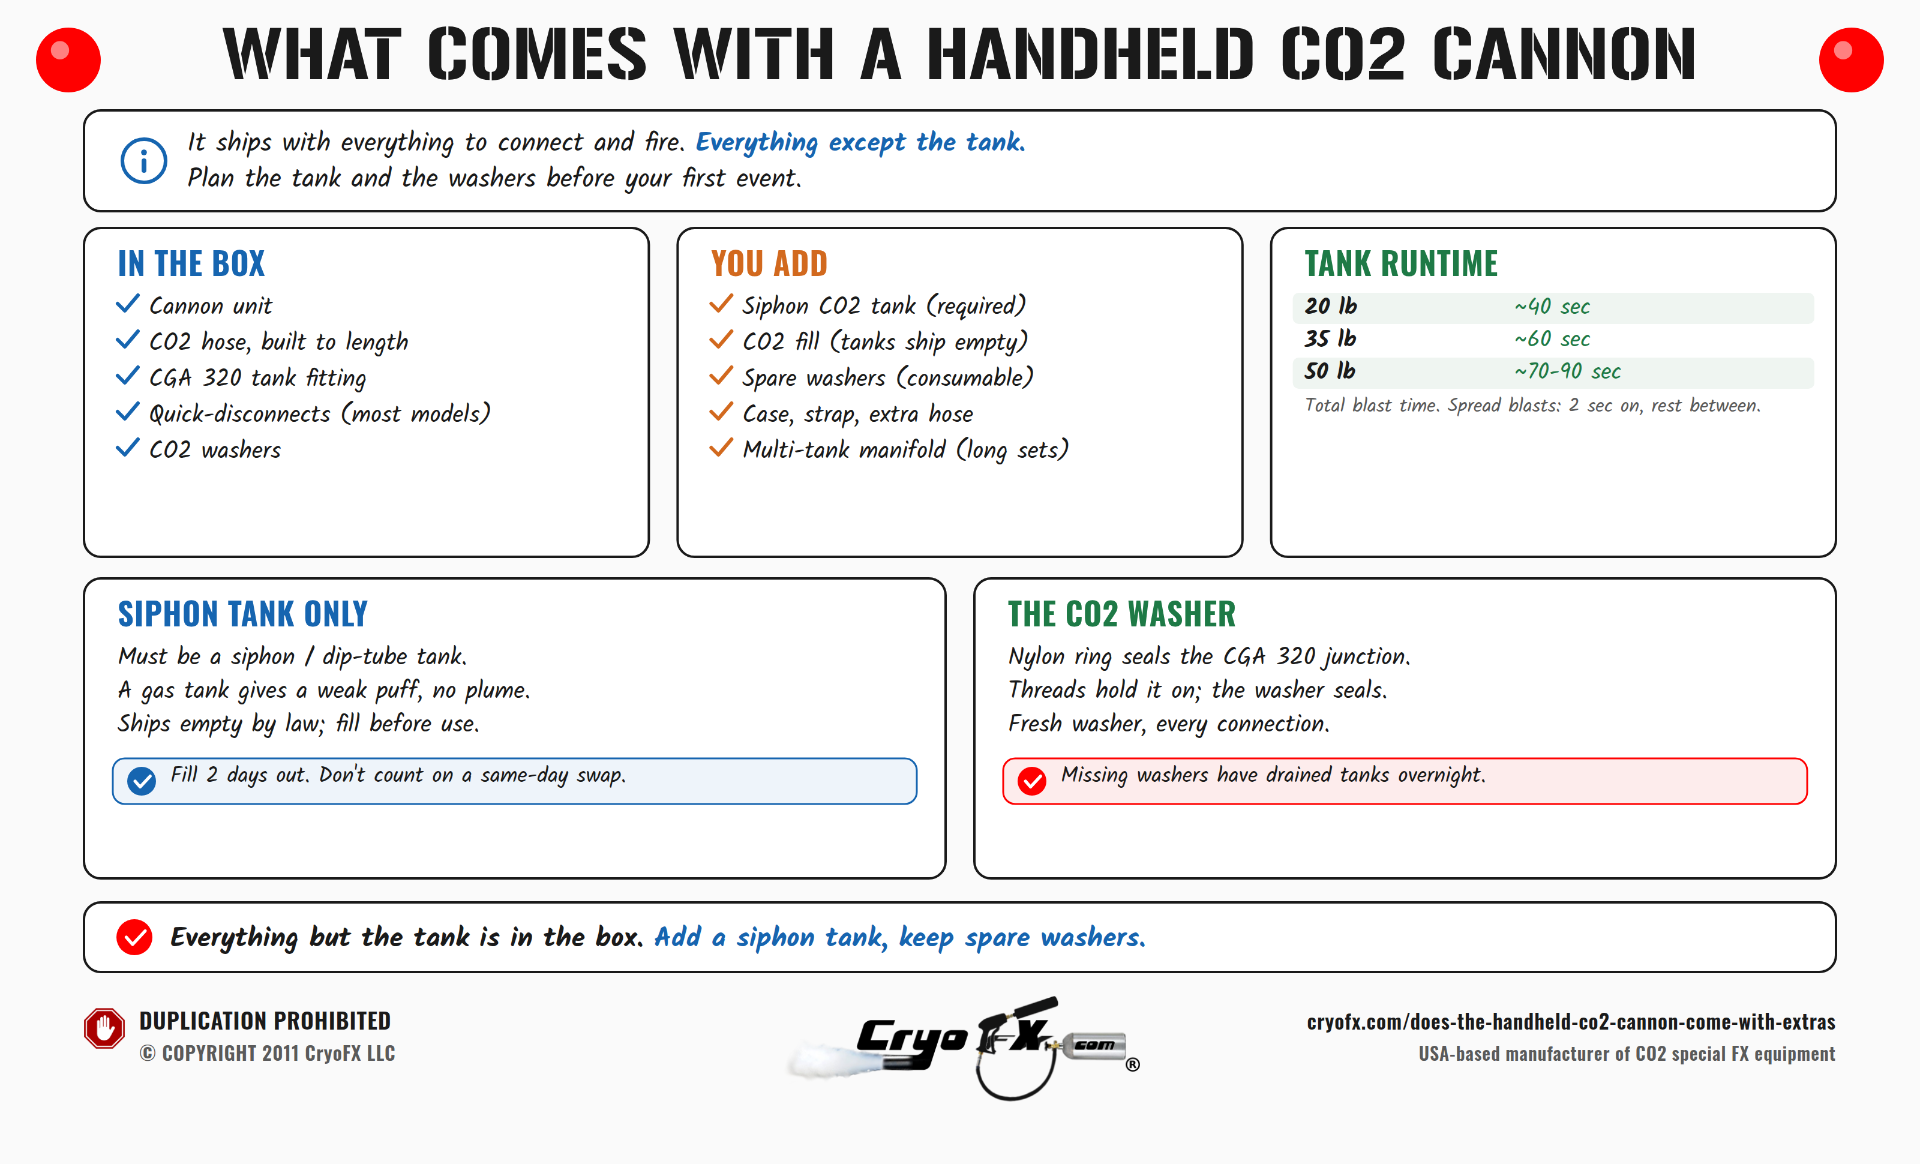
The hose length you receive depends on what you selected at purchase. CryoFX builds their hoses to order, so you can request whatever length fits your setup, standard DJ setups typically use 20 to 50-foot runs. The hose comes with fittings already attached, including the CGA 320 CO2 tank fitting on the tank end. The CGA 320 is the standard thread fitting used on CO2 tanks in special effects, beverage, and industrial applications.
The CO2 washers deserve more attention than they usually get. Each washer is a small nylon ring that bridges the metal-to-metal connection between the CGA 320 fitting and the CO2 tank. The threads on the CGA 320 fitting are not the sealing mechanism, they hold the fitting on the tank, but the actual gas seal happens at an internal metal-to-metal junction. Without a nylon CO2 washer at that connection, liquid CO2 will leak. Every time. It may be a slow leak or a fast one, but the seal will not hold metal-to-metal without the washer.
CryoFX has been called out to stadiums where clients reported their CO2 system wasn't working. On inspection, the problem was the same each time: CO2 washers had not been used. Multiple large tanks had drained completely through leaking CGA 320 connections overnight, with the clients never knowing the CO2 was escaping. By showtime, there was nothing left. One nylon washer per fitting. Every connection. Every time.
Depending on the model you purchase, the cannon may also come with quick-disconnect fittings at the connection between the hose and the gun. Quick disconnects are a convenience feature, they let you connect and disconnect the hose from the cannon without tools. Most CryoFX products include these. Check the specific product listing to confirm what's on your unit.
What you need to add
The one essential item that does not come with a handheld CO2 cannon is the CO2 siphon tank.
This is not a regular CO2 tank. It must be a siphon tube tank, also called a liquid CO2 tank or dip tube tank. Inside a siphon tank, a tube extends from the valve down to the bottom of the tank where the liquid CO2 sits. That tube draws liquid CO2 up and out when the valve opens. A standard gas CO2 tank, the kind that stores gas at the top, won't deliver liquid CO2 through the hose. Without liquid, there's no phase change at the nozzle, no frozen humidity, and no visible effect. You'll get a weak puff of gas, not the blast you're expecting.
The siphon tank isn't included with the cannon for a practical reason: tanks ship empty by law. They're regulated as pressurized vessels, and shipping them full is a separate, complicated process. Even if you purchase a tank from CryoFX, it arrives empty and needs to be filled before use.
Where do you get a siphon CO2 tank filled? Local gas suppliers, welding supply companies, and beverage CO2 distributors typically fill CO2 tanks. Call ahead to confirm they can handle siphon tanks specifically and what their turnaround time is. Some locations will swap your empty tank for a full one same-day; others require you to leave the tank for a day or more. If you're planning to use your cannon at an event next Saturday, have your tank filled by Thursday at the latest. Don't assume a same-day fill will be available.
CryoFX sells CO2 tanks in multiple sizes and can facilitate fills through their services division for customers who need more than 100 lbs of CO2.
Recommended tank sizes
For first-time setups, CryoFX recommends a 20 lb or 50 lb siphon CO2 tank. A 35 lb tank is also available and is a popular choice for professional CO2 special effects equipment situations.
Runtime is the most important factor to understand before you show up to a job:
- 20 lb tank: approximately 40 seconds of total blast time
- 35 lb tank: approximately 60 seconds of total blast time
- 50 lb tank: approximately 70 to 90 seconds of total blast time
These numbers catch first-timers off guard. Forty seconds sounds like a long time until you're at an event and you've burned through your tank in the first 10 minutes because you held the trigger for 3 to 4 seconds at a time across 12 blasts. Spread your blasts. Two seconds on, wait 30 to 90 minutes between sequences. If you need more runtime, use multiple tanks connected to a single hose.
CryoFX offers 2-to-1, 3-to-1, and 4-to-1 CO2 tank connection systems, hardware that allows multiple tanks to feed into a single hose. This extends your runtime without adding extra hoses or cannons to your setup.
Optional extras and upgrades
Beyond the tank, there are several accessories that professional operators add over time.
Additional CO2 washers should be the first thing on your list. You receive some with the cannon, but they're consumable. Each time you connect the CGA 320 fitting to a tank, you should use a fresh washer. Running out of washers mid-event, or grabbing a washer that's been used too many times, produces a leak you may not notice until your tank is empty. Buy a bag of extras and keep them in your kit always.
A carrying case or flight case protects the cannon during transport and keeps everything organized. CryoFX offers handles for specific cannon models as well. If you're moving equipment from event to event, a case isn't optional after the first time you show up with a damaged nozzle.
Extended hose lengths matter if your setup changes between events. Having a second hose in a different length gives you flexibility for different stage configurations.
A hose strap is a simple but useful addition for DJs who are moving around on stage. A strap helps manage the hose without it dragging on the floor or getting tangled while you're performing.
If you're using the cannon professionally with any regularity, a multi-tank connection manifold saves you mid-show tank swaps and keeps your runtime consistent across longer sets.
First use: step-by-step setup
For the handheld CO2 cannon guide covering all product categories, see cryofx.com/co2-cannon. Here's the first-use process specifically for a handheld cannon gun.
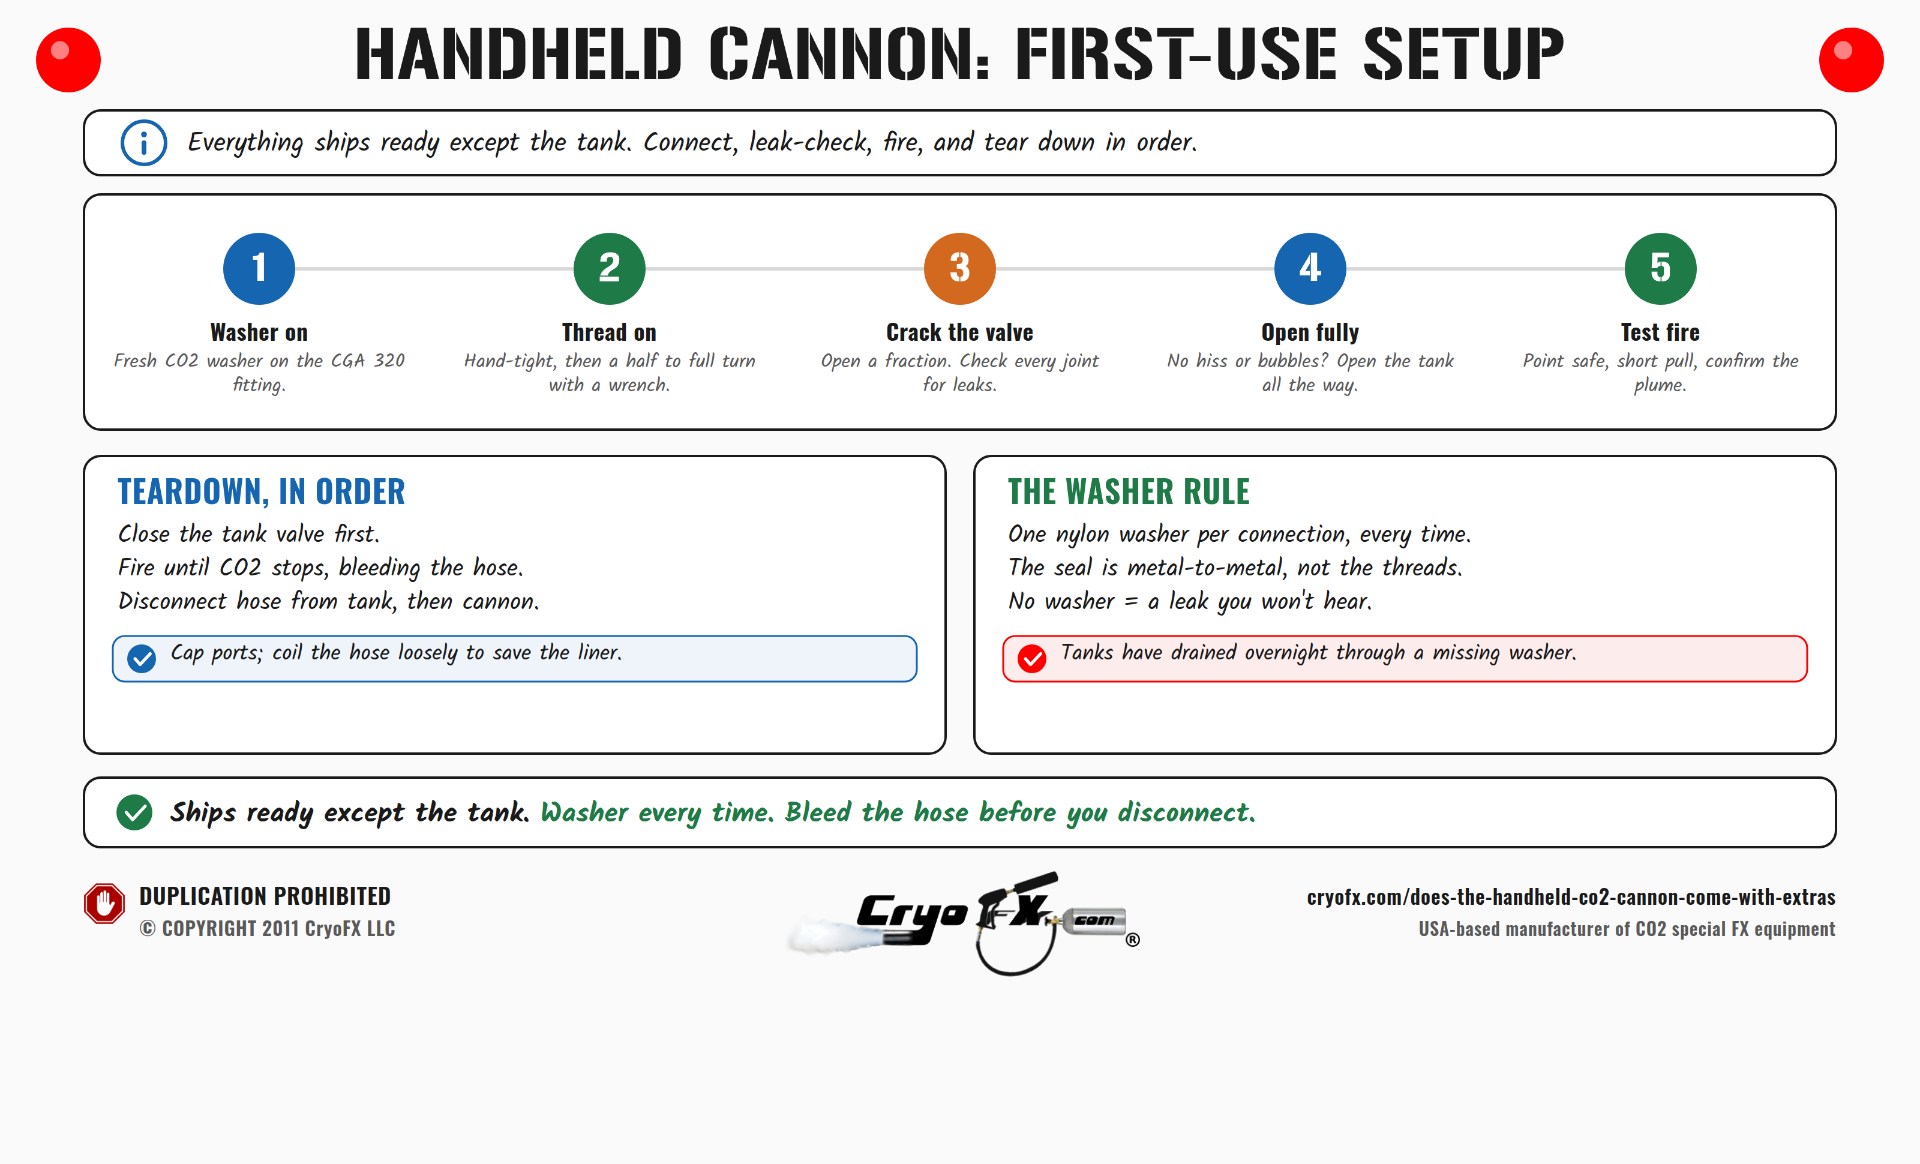
Start with all your equipment on the table: the cannon, hose, fittings, washers, and your full siphon CO2 tank. The tank valve should be closed. Confirm the hose is connected to the cannon, either via quick disconnect or direct fitting, depending on your unit.
Place a CO2 washer on the CGA 320 fitting at the tank end of the hose. Thread the fitting onto the CO2 tank valve by hand until it's snug, then use a wrench to tighten it one additional half-turn to full turn. Don't overtighten, but make sure it's secure. The CO2 washer creates the seal, the fitting doesn't need to be cranked down to grip strength to work.
With the fitting on the tank and the hose connected to the cannon, open the tank valve slowly, just a fraction, not fully. Let a small amount of pressure into the hose and check every connection point for leaks. You can hear a hiss if CO2 is escaping, or use soapy water on the fittings to see bubbles. If everything looks and sounds clean, open the tank valve fully.
Now test-fire the cannon. Point it in a safe direction (never at anyone), pull the trigger briefly, and confirm the effect is working as expected. If the blast is weak or there's little to no visible effect, check whether your siphon tank is actually full and whether it's a siphon tube model.
One common mistake that bypasses this whole process: turning the tank on before the quick disconnect is connected to the cannon. If the tank is pressurized and you try to attach the quick disconnect, the fitting won't connect under pressure. You'll need to loosen the CGA 320 at the tank enough to bleed the hose pressure, wait for the hose to depressurize (30 seconds to a minute and a half), then connect the quick disconnect and re-secure the fitting. Do not fully remove the CGA 320 from a pressurized tank, a pressurized hose that comes completely free will whip and can cause serious injury.
Maintenance after the show
Teardown is as important as setup.
Close the tank valve first. Then fire the cannon to bleed all remaining CO2 pressure from the hose. Keep pulling the trigger until nothing comes out. Once the hose is depressurized, disconnect the hose from the tank. Then disconnect the hose from the cannon if you're separating the components for storage.
Cap all open ports on the cannon and the hose fittings. Inspect the hose for kinks or damage, especially if it was run across a floor during the event. A kinked CO2 hose doesn't just restrict flow, repeated bending in the same spot will crack the inner liner over time.
Store the hose coiled loosely, never tightly wound. Tight coils stress the liner at the bend points. Store the cannon and hose in a case or bag if possible, and confirm your washer supply is stocked before your next event.
The handheld CO2 cannon for sale at cryofx.com/products/co2-cannon-products ships with everything described above except the tank. If you're unsure what size tank to start with or how to source CO2 in your area, CryoFX's team can advise based on your specific market and show requirements.
FAQ
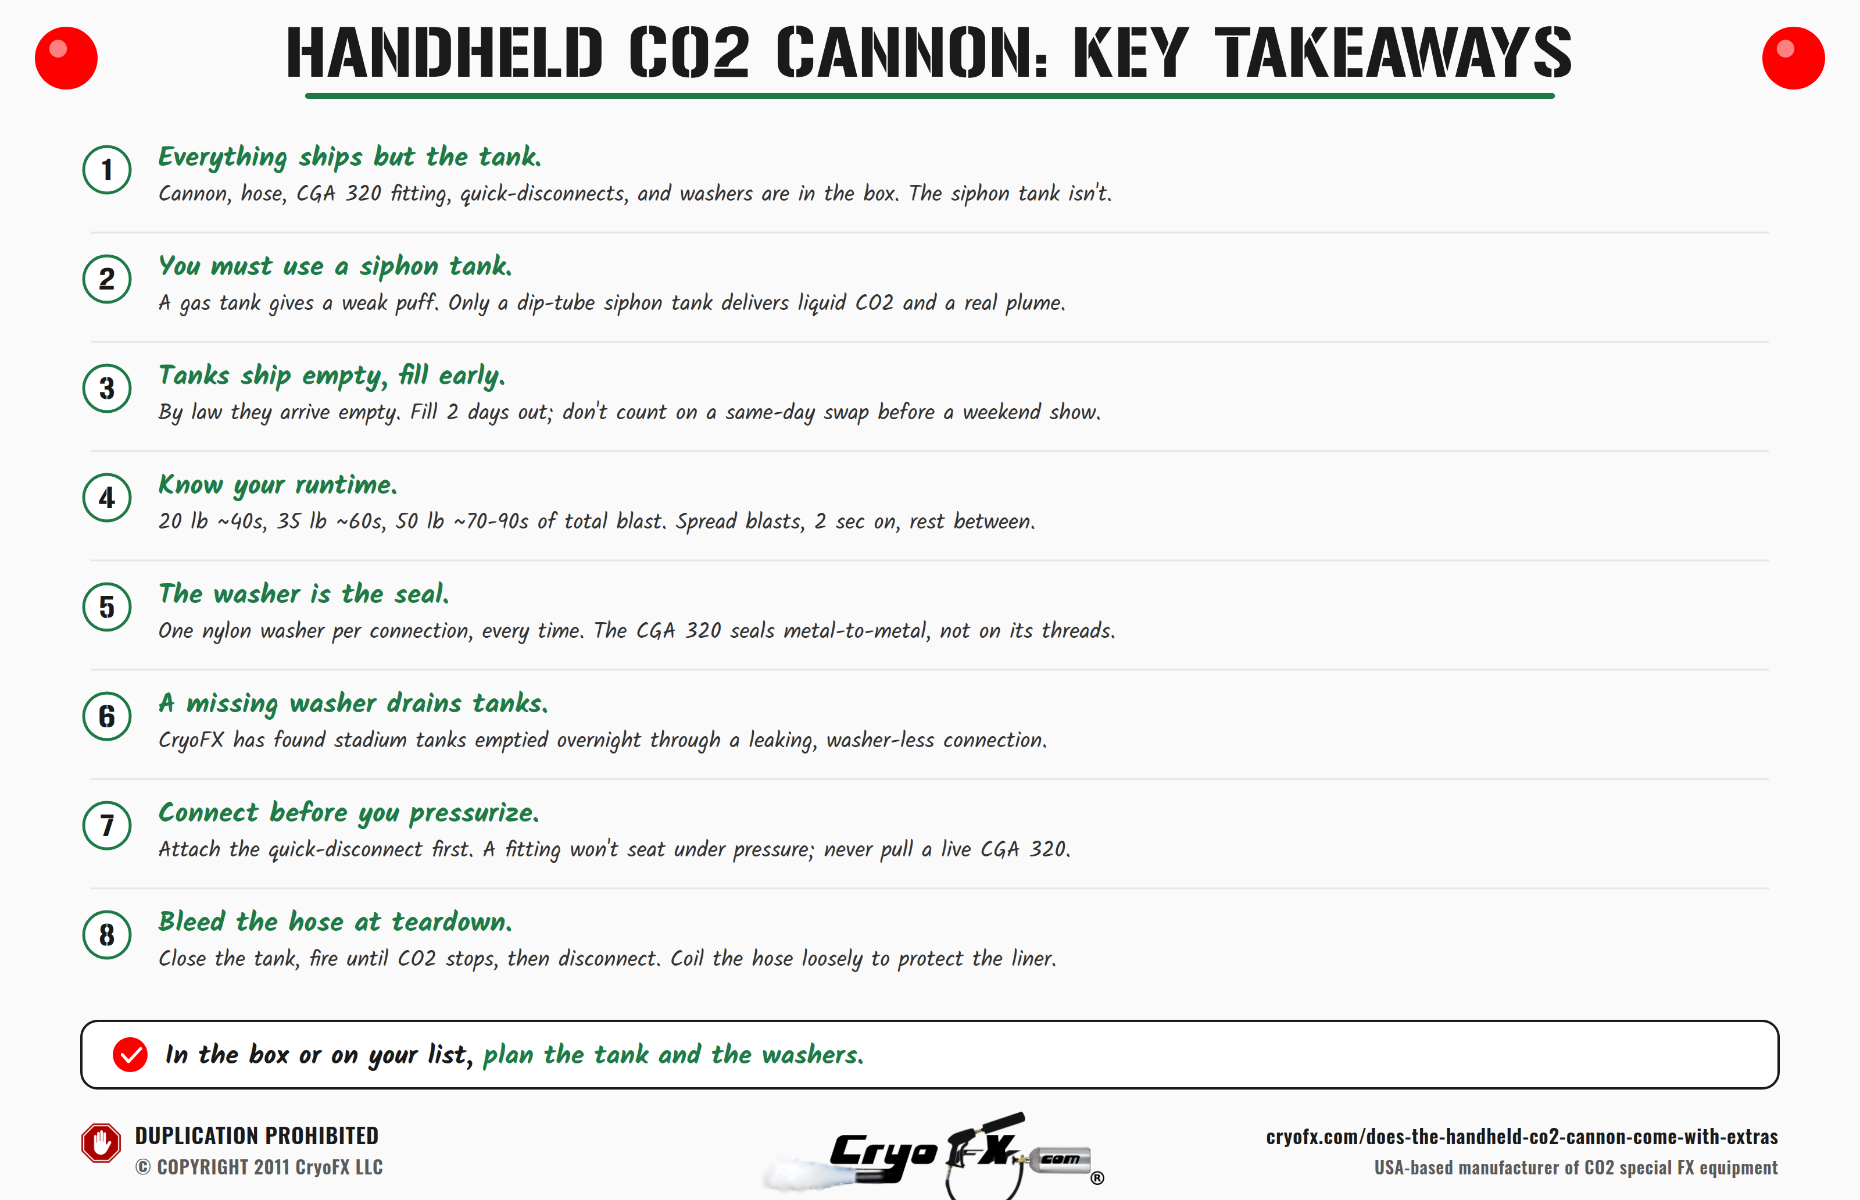
What comes with a CryoFX handheld CO2 cannon? The cannon unit, CO2 hose (in the length you select), CGA 320 tank fitting, quick disconnect fittings (on most models), and CO2 washers. The CO2 siphon tank is not included.
Why is the CO2 washer so important? The CGA 320 fitting seals at a metal-to-metal junction, not through its threads. A nylon CO2 washer bridges that junction and creates the actual seal. Without it, the fitting will leak CO2, sometimes slowly enough that you don't notice until the tank is empty. Use a fresh washer every time you connect a tank.
What size CO2 tank should a first-time buyer get? A 20 lb or 50 lb siphon tank is the standard recommendation for a first setup. The 20 lb gives roughly 40 seconds of total blast time; the 50 lb provides 70 to 90 seconds. For professional DJ use, a 35 lb tank is also a popular option.
Can you use a regular CO2 tank with a handheld cannon? No. You must use a siphon tube tank (also called a liquid CO2 tank or dip tube tank). A standard gas CO2 tank does not deliver liquid CO2 through the hose. Without liquid CO2, you won't get the phase change that creates the visible effect.
What's the most common mistake on first use? Not using CO2 washers, or turning on the tank before connecting the quick disconnect to the cannon. Both mistakes are easy to avoid once you know what to watch for. Keep a supply of washers in your kit and always confirm your quick disconnect is connected before opening the tank valve.
What hose lengths are available for a CryoFX handheld CO2 cannon? CryoFX builds their CO2 hoses to order, so you can request any length that fits your setup. Standard DJ and event configurations typically use 20 to 50-foot runs. The hose arrives with fittings already attached, including the CGA 320 CO2 tank fitting on the tank end. Having a second hose in a different length is useful if your setup changes between events.
What optional accessories should a professional DJ add to a CO2 cannon kit? The most useful additions beyond the tank are extra CO2 washers, a carrying or flight case, extended hose lengths for different stage configurations, a hose strap for managing the hose while moving on stage, and a multi-tank connection manifold. The manifold allows two to four siphon tanks to feed into a single hose, extending runtime without mid-show swaps.
What is a multi-tank CO2 connection system and when should you use one? A multi-tank connection system is hardware that allows two, three, or four CO2 siphon tanks to feed into a single hose and cannon. CryoFX offers 2-to-1, 3-to-1, and 4-to-1 configurations. When one tank empties, the system continues drawing from the remaining tanks. Use one for longer shows where a single tank would run out before the set ends.
How should you tear down and store a CO2 cannon after an event? Close the tank valve first, then fire the cannon until no CO2 comes out, bleeding all pressure from the hose. Disconnect the hose from the tank, then from the cannon. Cap all open ports. Inspect the hose for kinks or damage. Store the hose coiled loosely rather than tightly wound, since tight coils stress the inner liner over time.
Updated - 07/23/2026.