How to Make a CO2 Blaster? Assembly, Components, Hoses
How to Make a CO2 Blaster? Assembly, Components, Hoses

How to make a CO2 blaster: assembly, components, hoses
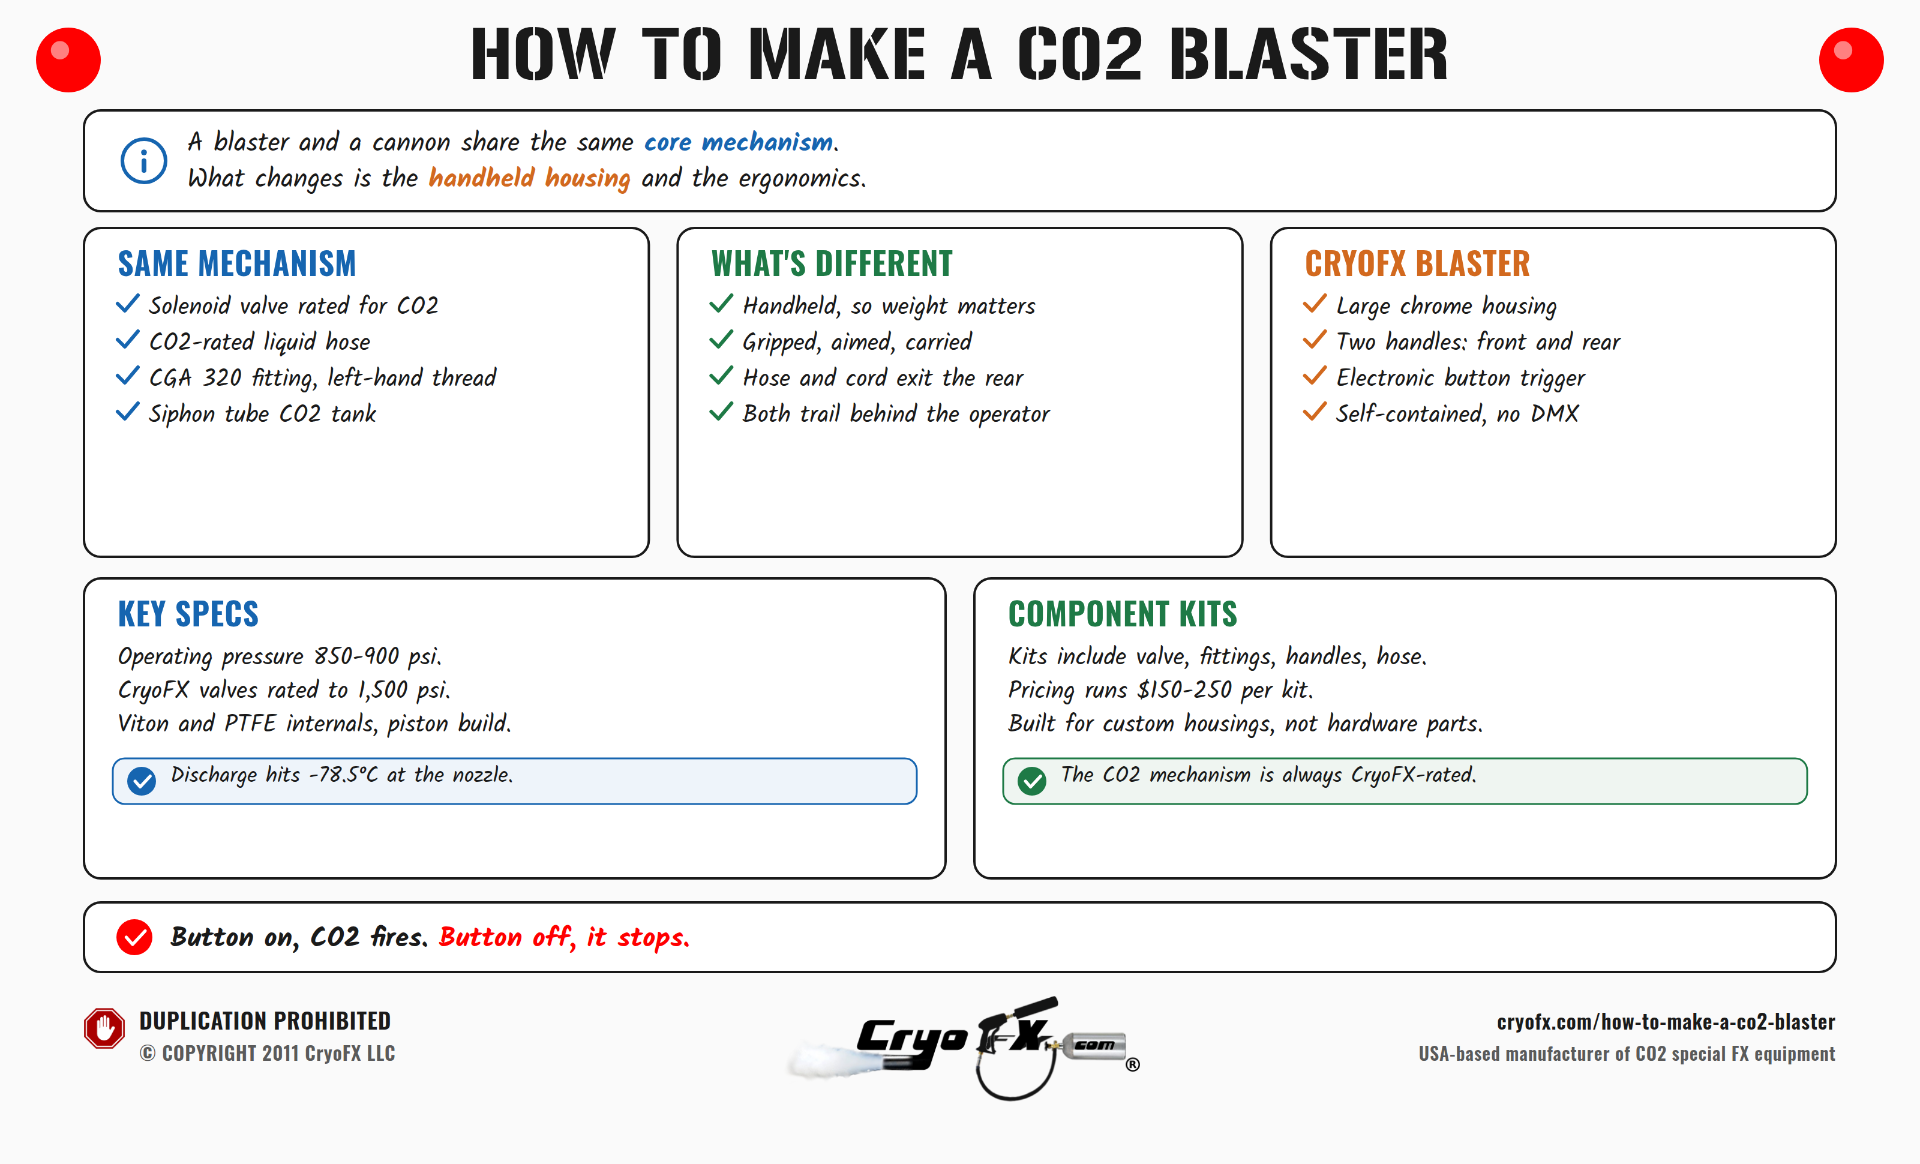
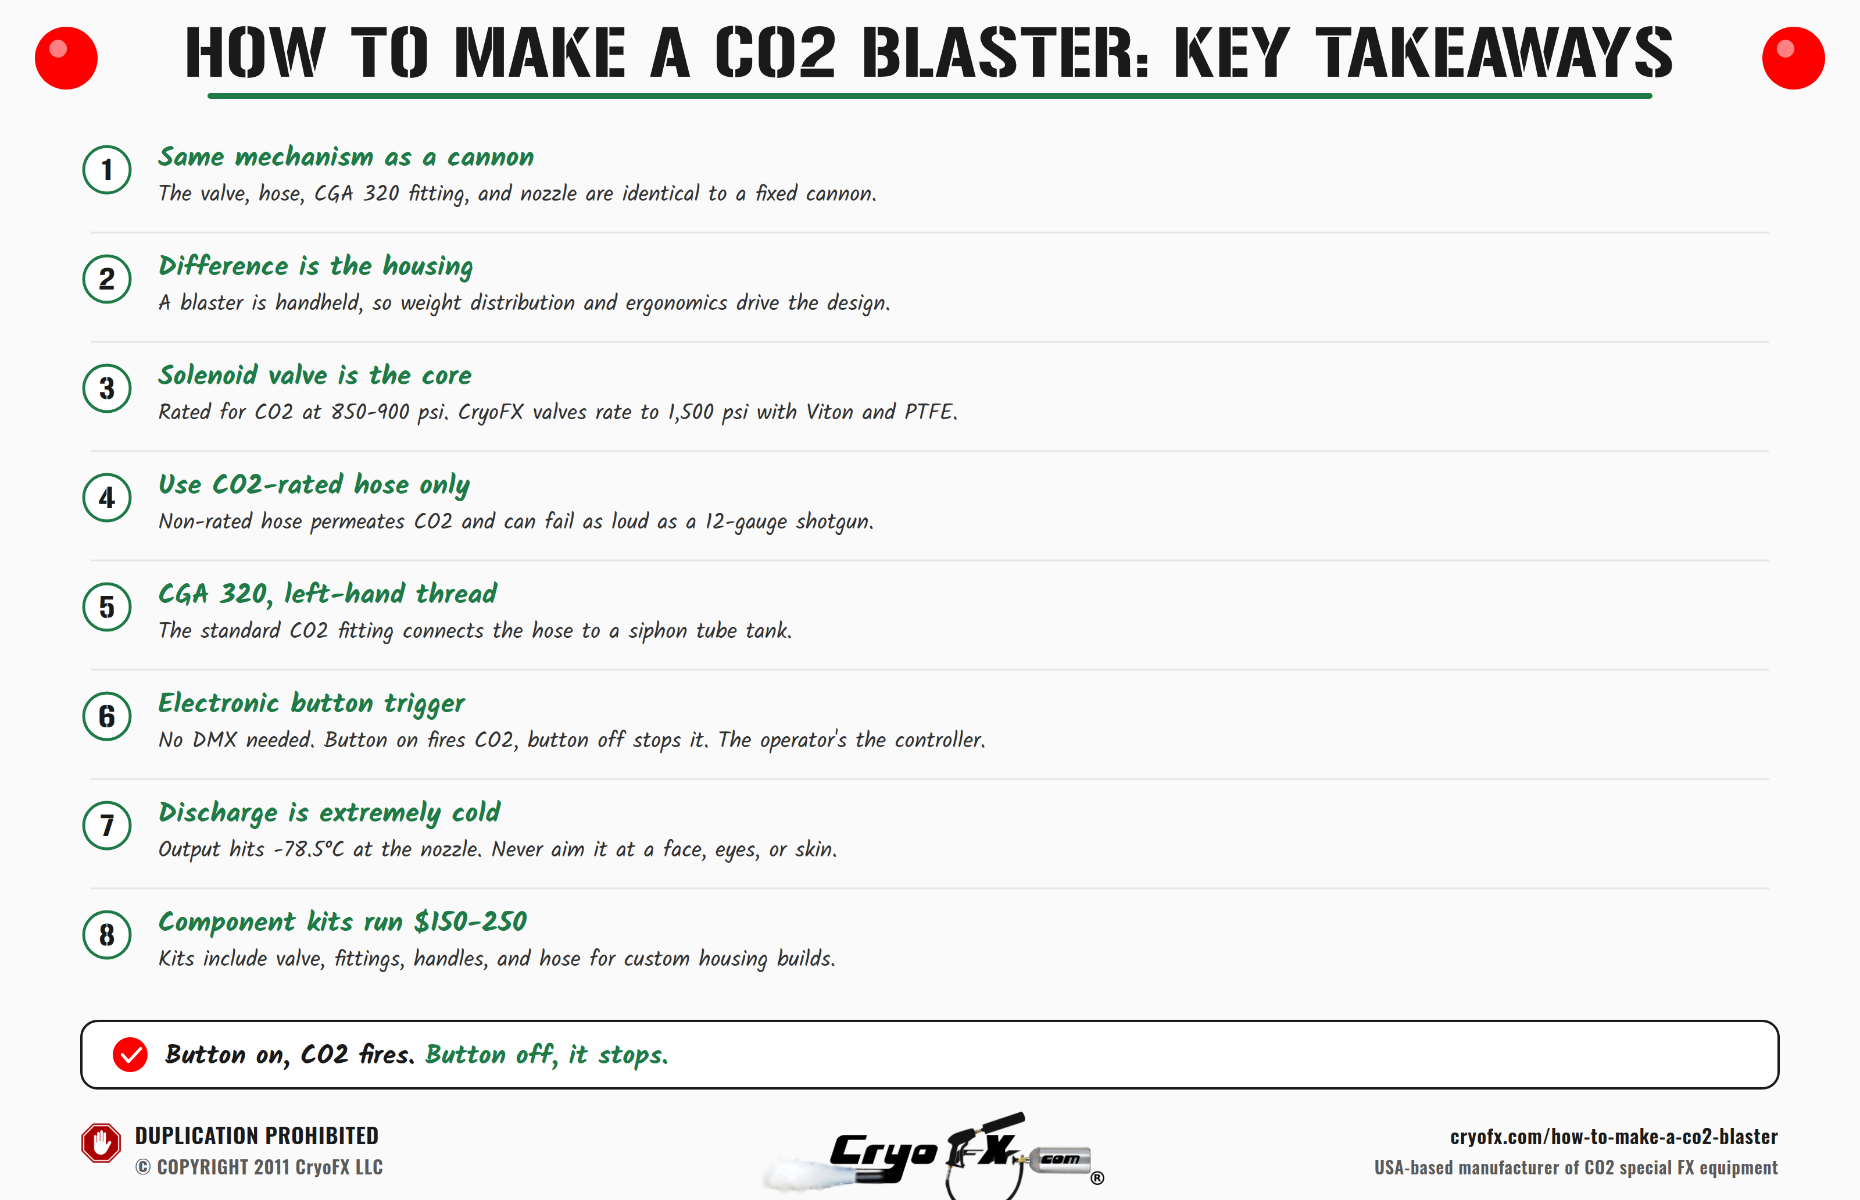
A CO2 blaster and a CO2 cannon share the same core mechanism. The valve, the hose, the fittings, the tank connection: all identical at the component level. What changes is the housing, the ergonomics, and the use case.
When someone asks how to build a CO2 blaster, the answer runs parallel to building a CO2 cannon with one additional design layer: the device is handheld, operated by a person in motion, and the housing has to work physically for a person holding it during a performance. That changes the design priorities even though it doesn't change the CO2 system itself.
CO2 blaster vs. CO2 cannon: does the DIY approach differ?
Not in any fundamental way. The mechanism producing the effect is the same: a solenoid valve, rated for CO2 service, opens to release liquid CO2 from a siphon tube tank through the valve and out the nozzle. The valve, hose, CGA 320 fitting, and nozzle requirements are identical between a blaster and a fixed cannon.
The difference is physical. A CO2 blaster is handheld, which means weight distribution matters in a way it doesn't for a fixed mount. A fixed cannon sits on a truss clamp or stage mount. Nobody is holding it and moving with it for an hour. A blaster is gripped, aimed, and carried through a performance. If it's front-heavy, back-heavy, or the handles are in the wrong position, the operator notices immediately and it affects the show.
The hose comes out of the rear of a CO2 blaster, along with the power cord. Both trail behind the operator. How those connections are routed, how they're protected, and how they're managed during use are design considerations that don't apply to fixed cannon installations.
Components needed for a CO2 blaster
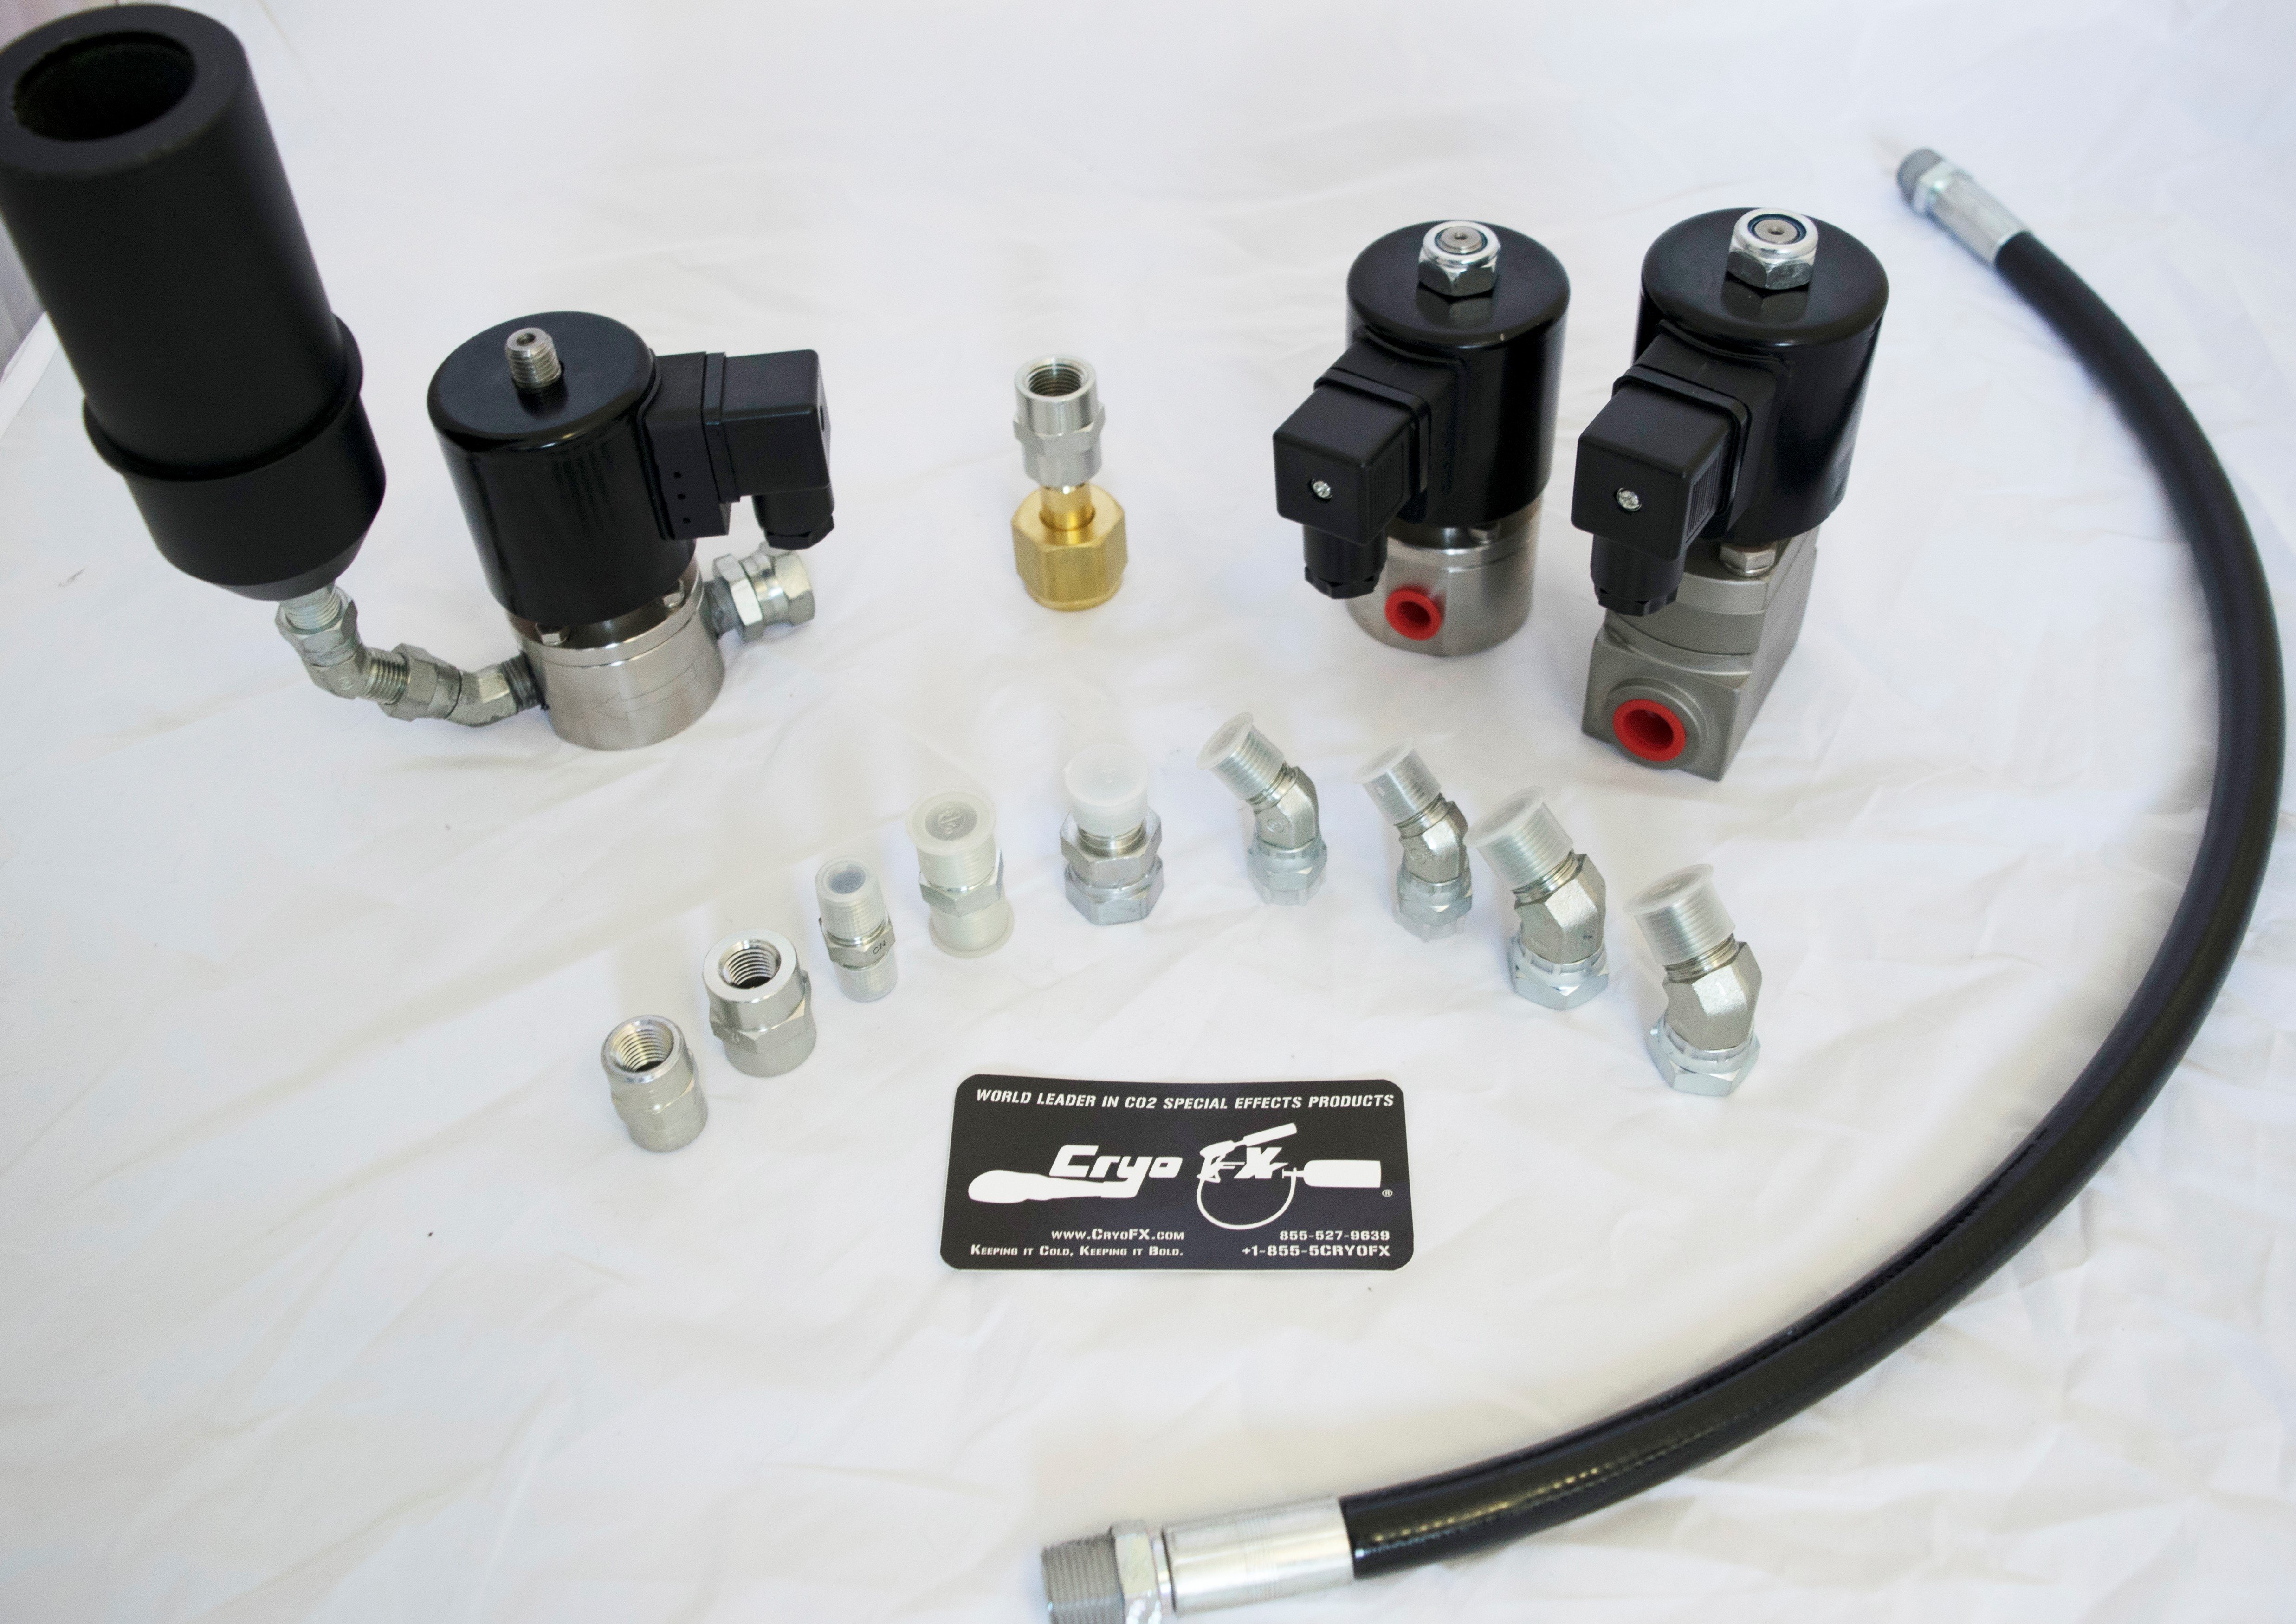
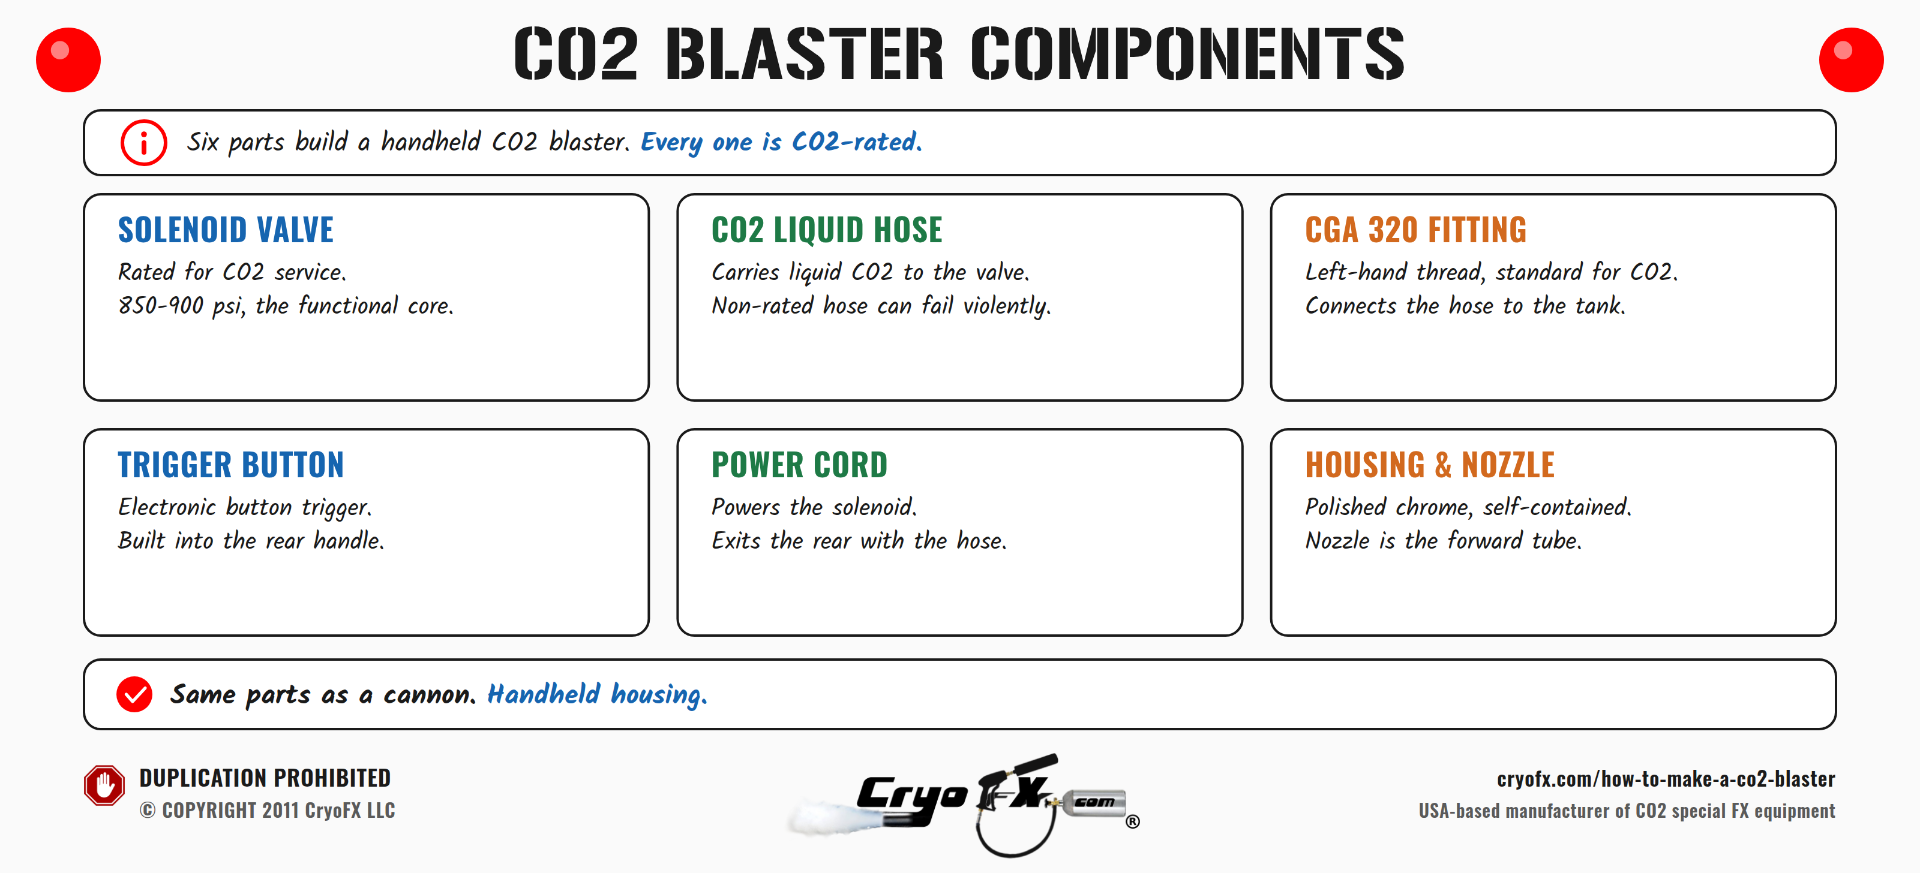
The CO2 mechanism components are the same as a cannon:
Solenoid valve. Rated for CO2 service. Operating pressure 850-900 psi. CryoFX valves are rated to 1,500 psi, using Viton and PTFE internal materials. Piston construction. The solenoid valve is the functional core of any CO2 device, blaster or cannon.
CO2-rated liquid hose. The hose carries liquid CO2 from the tank to the valve. The hose must be rated for CO2 service. Non-rated hose will permeate CO2, produce odor, develop pressurized bubbles in the wall, and can fail violently. When a bubble in a non-CO2 hose fails under pressure, the sound is comparable to a 12-gauge shotgun at close range. This is not a risk to take with a hose that runs against a person's body.
CGA 320 fitting. Left-hand thread. The standard fitting for CO2 service connections. This connects the hose to the tank.
Trigger mechanism. On a CO2 blaster, this is an electronic button. Not a mechanical lever, not a pneumatic trigger: a button that activates the solenoid electrically. The button is built into the rear handle.
Power cord. The solenoid requires electrical power. The power cord runs out the rear of the blaster with the CO2 hose.
Nozzle. On a CO2 blaster, the nozzle is typically the entire forward tube of the housing. The output comes out the front end.
Housing. This is where the blaster diverges from a fixed cannon. A CO2 blaster housing is polished metal or chrome, large in format, and contains both handles and all internal components in one self-contained unit.
Physical design of the CryoFX CO2 blaster
The CryoFX CO2 blaster is a large chrome housing. Not a small device. The chrome finish is polished metal, giving it the visual weight appropriate for entertainment use: it reads as significant and professional on camera and on stage.
Inside the housing, the solenoid valve controls CO2 flow. The activation is an electronic button built into the rear handle. Two handles total: one at the front of the housing for grip and aim control, one at the rear with the trigger button for activation. The hose and power cord exit from the rear of the unit.
This design is intentional. Both trailing connections at the rear keep the front of the device clean for the visual effect and prevent cables from crossing the operator's line of sight or movement. The rear handle controls activation. The front handle controls direction.
The entire unit functions as a self-contained system once connected to a CO2 tank via the hose. No rack gear, no DMX interface, no controller needed. Button on, CO2 fires. Button off, CO2 stops.
Safety considerations specific to handheld CO2 devices
A handheld CO2 blaster carries a different risk profile than a fixed cannon mounted 15-20 feet above an audience.
Directional risk. A fixed cannon typically fires vertically or at a controlled angle. A handheld blaster is aimed by the operator. Untrained operators aim at people. The output from a CO2 blaster is extremely cold (-78.5°C at the point of discharge) and is moving at speed. Aiming it at a face, eyes, or exposed skin at close range causes injury.
Valve freeze risk. Repeated rapid activations without cooldown cause the valve to freeze closed or open. The correct use pattern is 30-60 seconds of activation with a recovery period before the next extended use. Operators who ignore this waste their CO2 on a frozen valve or lock it open.
Physical contact with the valve body during discharge. The exterior of the blaster housing reaches very cold temperatures during sustained use. Bare-skin contact with the housing near the valve area during or after discharge can cause cold burns. Gloves are recommended for operators using the device extensively.
Pressurized hose management. The hose connecting the blaster to the CO2 tank is under 850-900 psi when the system is live. A hose that separates under pressure whips at force. Any hose connection should be inspected before use, and the tank should be closed before the hose is disconnected.
Setup procedure: connect the hose to the blaster first, then to the tank. The tank valve stays closed until the hose connection is confirmed secure and a CO2 washer is in the CGA 320 fitting. Open the tank slowly to pressurize the hose before opening fully.
CryoFX components and custom builds
CryoFX sells component kits for builders who want to create their own CO2 blaster housing. Kits include the valve, fittings, handle components, and hose. Pricing runs $150-250 depending on the kit configuration.
The line between what CryoFX will support as a component customer and what requires purchasing a complete unit comes down to the objective. A customer building a custom housing for a specific theatrical prop or themed installation, using CryoFX-rated CO2 components inside, is the right use of component kits. A customer trying to build the CO2 mechanism itself from hardware store parts is not.
CryoFX components for custom builds have appeared in some unusual places. Rose Bowl parade floats have used CryoFX CO2 equipment, with the CO2 system integrated into the float structure and the output timed to the performance. Automobiles, speedboats, and custom vehicles have run CryoFX CO2 components for entertainment and promotional use. Optimus Prime (the Transformers character's truck used in promotional appearances) has had CryoFX CO2 equipment operating on it.
These are not standard CO2 blaster or cannon configurations. They're custom integrations built around the same core components. The CO2 mechanism is always CryoFX-sourced and rated. The housing and integration are custom. That's the correct approach to any CO2 special effects DIY project.
For a complete reference on CO2 cannon and blaster specifications, setup, and operational guidance, the CO2 cannon and blaster guide on CryoFX's website covers the full range of available equipment.
CO2 blasters for sale from CryoFX include the complete chrome handheld unit, component kits, and replacement parts.
FAQs
Is there a difference between building a CO2 blaster and a CO2 cannon from a technical standpoint? The CO2 mechanism is identical. Both require a CO2-rated solenoid valve, CO2-rated liquid hose, CGA 320 fittings, and a siphon tube CO2 tank. The distinction is in the housing and ergonomics. A blaster housing is handheld and optimized for operator movement. A cannon housing is typically designed for fixed or semi-fixed mounting.
Can I use a regular garden hose or water hose for a CO2 blaster build? No. CO2 permeates through hose materials not rated for CO2 service. This produces odor, creates pressurized bubbles in the hose wall, and can result in the hose failing explosively under pressure. Only hose rated for high-pressure CO2 liquid service should be used.
What size CO2 tank works with a CO2 blaster? 20 lb siphon tube CO2 tanks are the most common choice for handheld CO2 blaster use. They're manageable to transport and provide roughly 40 seconds of continuous use or a meaningful number of short blasts. Larger tanks deliver more runtime but add weight and logistical complexity to a setup where mobility matters.
How do I know if the solenoid valve I'm looking at is rated for CO2 service? The valve's data sheet should list operating pressure (at minimum 850-900 psi for CO2 service), temperature range (must cover -78.5°C / -109°F), and sealing materials (Viton and PTFE for cryogenic CO2 compatibility). A valve rated only for water, air, or general gas service is not sufficient. If the rating isn't explicitly documented, assume it isn't rated.
Does a CO2 blaster require DMX control? No. The CryoFX CO2 blaster operates on a direct electronic button trigger. DMX is used for fixed CO2 cannon installations where the activation needs to be controlled from a lighting or effects console. A handheld CO2 blaster operated by a performer or DJ doesn't benefit from DMX; the operator is the controller.
What happens if a CO2 blaster is activated repeatedly without cooldown between blasts? Rapid repeated activations without adequate cooldown cause the solenoid valve to freeze. Depending on the failure mode, it either freezes closed (blocking CO2 flow) or freezes open (allowing continuous discharge the operator can't stop without closing the tank valve). The correct operational pattern is 30-60 seconds of activation with a recovery period before the next extended use. Ignoring this wastes CO2 and can damage the valve.
How does the physical design of a CO2 blaster differ from a fixed CO2 cannon? A CO2 blaster housing is designed to be carried and operated while moving. It's a polished metal or chrome format with dual handles, a front-to-back nozzle, and all internal components in one self-contained unit. The power cord and CO2 hose run out the rear. A fixed CO2 cannon is designed to mount in one position on truss, stage structure, or ceiling, and receives DMX control signals rather than a hand trigger. Both use the same solenoid valve and hose mechanism but differ entirely in housing, ergonomics, and deployment.
What sealing materials are required in the solenoid valve of a CO2 blaster? Viton for O-rings and seals (flexible at cryogenic temperatures) and PTFE at valve seats and sliding surfaces (chemically compatible with CO2 and low-friction). These materials are required because CO2 discharge chills the valve to cryogenic temperatures with every activation. Standard rubber and neoprene become brittle at those temperatures and will eventually crack or harden, losing seal integrity.
Why is operator training important for CO2 blasters specifically compared to fixed cannons? A fixed CO2 cannon fires in a fixed, pre-approved direction. A handheld CO2 blaster is aimed by whoever is holding it. An untrained operator will aim at people, which can cause cold burns or eye injury from direct discharge at close range. Understanding cooldown requirements, minimum safe distances, and how to close the tank valve in an emergency is non-optional for handheld operation.
Updated - 07/25/2026.